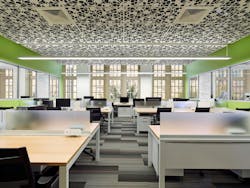
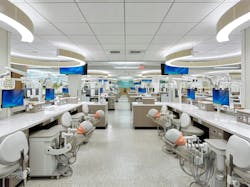
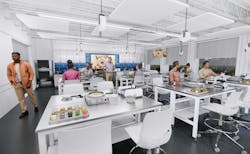
Laboratories provide valuable spaces for research, analysis and hands-on teaching and learning. Traditionally associated with sciences such as biology and chemistry, labs also can be incorporated into engineering, mathematics, physics, food science and medical programs, or can support multiple majors or general education. Whether a space requires advanced equipment or basic technology, components such as ventilation, storage, class size, and furniture all play a role.
Building a new laboratory in an existing building can be a daunting task. However, it can be done. Using the following smart strategies, you can work your way through the unknown and into the bright, shiny lab your students and faculty have envisioned.
What is feasible?
Nothing pays off more than an early feasibility study. Detailed studies may assess research methodologies and pedagogy trends in addition to evaluating spatial needs. Even a low-cost, short-duration study may provide comparable analyses of multiple potential spaces, confirm whether a selected space is appropriate or evaluate alternatives.
The study also may identify potential pitfalls and establish a preliminary budget. Your first space choice doesn’t work out? The early investment means you can restart your planning with clear parameters.
A study also may help establish a programming approach. When relocating a lab, a walkthrough of existing space provides an opportunity to ask users about their daily and most frequent tasks, assess active and inactive storage, diagram equipment layouts, and establish a common language for the project team.
Less may be enough
Given a blank slate, everyone is likely to ask for more space. In reality, many labs don’t need so much space and can be inserted into smaller areas. When working with an existing lab and a primary investigator (PI) or researcher, perform a thorough space walk-through and inventory. Calculate square footage and linear feet of workspace and storage. Really home in on storage. Often, closets and cabinets are filled with material that hasn’t been touched in years. Determine if infrequently used items could be stored in a secure, separate location.
For example, refrigerators and freezers can be large, loud and heat-generating. A shared refrigeration farm can be an excellent use of outside space. Student write-up space may also be shared, allowing for the number of students working on a project to expand or contract organically as one research assignment or class ends and another begins. Separate writing space also lets students enjoy a coffee while working—a major no-go inside most labs.
In-depth interviews
Interview the users of a lab in formal, in-person sessions. Use a standard questionnaire and include quantitative (e.g., scale of 1-to-5, yes/no) and qualitative (open-ended) questions to gain both comparable data and meaningful detail. Understand how many researchers, students and assistants will work in the lab.
What are their roles and most common tasks? Will lab instruction be combined with lectures? How do students work together: independently, in defined groups, or in a variety of arrangements based on assignment? How will the lab’s purpose or work change over the next five years: more or fewer people, equipment updates, planned course growth? What elements are cutting-edge today, but may become commonplace in the future? What equipment must be dedicated versus shared?
Also consider audiovisual equipment such as monitors, sound systems, smart boards, cameras and connectivity for remote or recorded sessions. Will an instructor want to broadcast bench demonstrations via screen? How can the lab design or technology ensure that all students have clear visibility to instructional techniques?
Reiterate and repeat
Every lab is different and so is every PI. Take the time to interact directly with the lead PI, key collaborators, research assistants and other stakeholders. Repeat critical concepts to understand goals. Once you've completed the initial interviews, take the time to process and format this input and return it for review. As the design develops, review progress with the core users to make sure you’re still on track to meet their specific needs.
Evaluate equipment
Equipment plays a critical role in lab size and functionality. Consider equipment needs, beginning with the earliest feasibility study and continuing through walkthroughs and interviews. Develop a matrix that includes all equipment, common and technical names, manufacturers, and model numbers.
Expand this with utility information such as power and water requirements, cord length, plug type, size, weight and other attributes. Does the item need to fit within cabinetry or under a bench? Should it move? Consider that casters can add several inches of height. The matrix also may include logistics. Will the university or contractor purchase or install? Will existing items need to be stored during construction? Even owner-installed equipment must be tracked to ensure proper connectivity.
Avoiding common errors
Potential issues that are commonly missed when labs are designed include HVAC, electrical capacity and emergency power. Don’t leave your MEP engineer scrambling to solve challenges that could be avoided. Fume hoods or other specialized HVAC equipment can drive retrofit costs. Outdoor air requirements or pressure differentials may limit where a lab can be situated. HVAC and exhaust needs should be addressed early to ensure pathways to a building’s exterior.
Electrical capacity typically requires a full equipment list to fully specify, but an early evaluation can confirm whether sufficient power is available in the building or on existing electrical panels. Limitations can significantly affect cost and lead time. Consider which equipment may need emergency generator power, such as long-term research refrigeration. No one wants to lose years of research because of a single storm-related power outage.
Pay attention to compliance with the Americans with Disabilities Act (ADA)—it sometimes may be overlooked in highly specialized lab environments. In order to consider every possible user, ensure ADA height spaces, incorporate adjustable lab benches or tables for flexibility, and confirm that circulation paths are able to accommodate wheelchairs.
Mock it up
Painter’s tape and cardboard can help non-architects visualize a 2D plan. Use a mock-up to ensure that aisles have an adequate width and that benches provide appropriate workspace. Don't forget to mock up the vertical space, too, to ensure that storage and tools are reachable.
Following these steps—feasibility studies, realistic space considerations, in-depth interviews, reiteration and confirmation of information, equipment evaluations, avoiding commonly missed items, and using mockups—provide a roadmap for colleges and universities seeking to design and build labs that are purposeful for the present and accommodate the future.
Caitlin A. Daley, AIA, is president of BKP Architects, a Philadelphia-based practice with an extensive portfolio of higher education work. She can be reached at [email protected].
About the Author
Caitlin Daley
Caitlin A. Daley, AIA, is president of BKP Architects, a Philadelphia-based practice with an extensive portfolio of higher education work. She can be reached at [email protected].


